home |  electronics |  toolbox |  science club |  tuxtalk |  photos |  e-cards |  online-shop

http://tuxgraphics.org/electronics


Content:
By Guido Socher


Remote flower watering and monitoring, part II (automatic garden watering)

[Illustration]

Abstract:

Last year we developed the tuxgraphics "ethernet flower care" solution and we tried different sensors to measure soil humidity.

Simple metal sheets used as capacitive soil humidity sensors turned out to be the best solution. This type of sensor is robust and reliable at the same time.

This article describes now some software enhancements. We add a timer function which enables you to water your plants automatically every day if needed.

The hardware is still the same. You need:

  1. A tuxgraphics ethernet board with atmega328p.
  2. The add on electronics for the capacitive humidity sensor.
  3. Two metal sheets (2.5cm x 10cm, 1inch x 4inch]) for the actual soil humidity sensor.
  4. A relay to switch on/off the water valve or pump.

  5. An optional push button to start/stop watering locally.
  6. An optional ds18s20 temperature sensor.
You need as well a programmer to load the software to the tuxgraphics ethernet board or you can order a board pre-loaded with software. There are different ways to control the water and dependent on that you need a different power source for the circuit.

_________________ _________________ _________________


The idea: automatic garden watering

Until now the software provided measurements of temperature and soil humidity. It plotted graphs to show trends. The actual decision as to when to water was however left to the user. The water flow was started with a simple button click on a web page or by pushing an optional push button at the ethernet board.

The local push button became available with software version 2.0. It is convenient if you are already in to garden and you want to stop or start watering.

The new part we add here is a software only change and it provides an automatic timer. The system checks everyday at a configurable time how dry the soil is and then decided automatically if watering should be started or not.  

Time is relative

We were fist thinking of adding NTP clock functionality to the code such that we can always get accurate time over the network.

After prototyping this we found that the accuracy of such a clock is not really needed at all and a simpler solution is actually better.

Plants do not need to be watered at the exact same second every day. You want to be able to do something like "water every day at this time if wet" or "water every day in the early morning hours".

This means we just have to accurately manage time differences to check if the plants need to be watered and we do that check very day at the same time but we don't need an absolute clock.

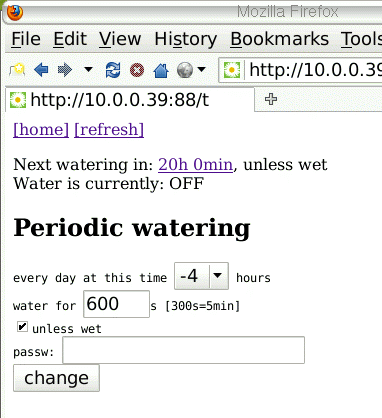
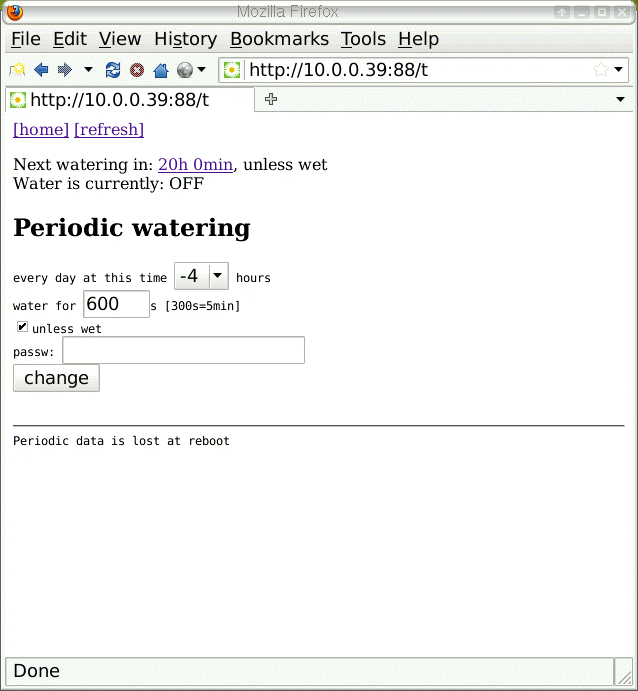
screenshot-timer
The timer configuration page for the automatic periodic watering. At the top you see when the next watering will be and if there is currently water flowing or not (as the watering can conditional it could be that the water flow was not started). Below you can change the settings. By clicking on the link on the top behind the watering time you can switch this automatic watering functionality totally off.
 

Watering indoor plants

Small energy efficient pumps are the best solution to provide water to indoor plants. You can find such pumps in shops that sell solar powered fountains. Those pumps are not very strong but that is exactly what you need. You don't want to excavate you plants with a water jet. You can find some links to online shops selling pumps in the previous article

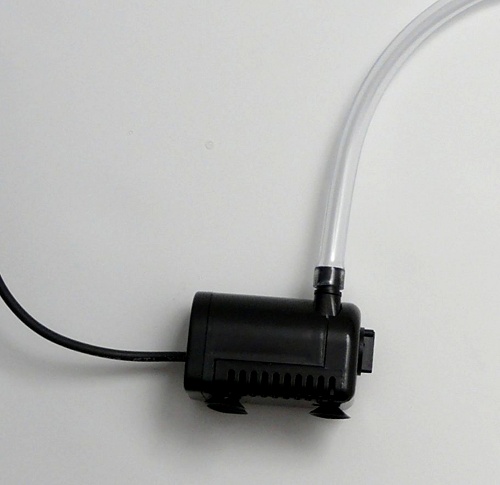
small DC pump
A small submergible pump for a solar powered fountain.


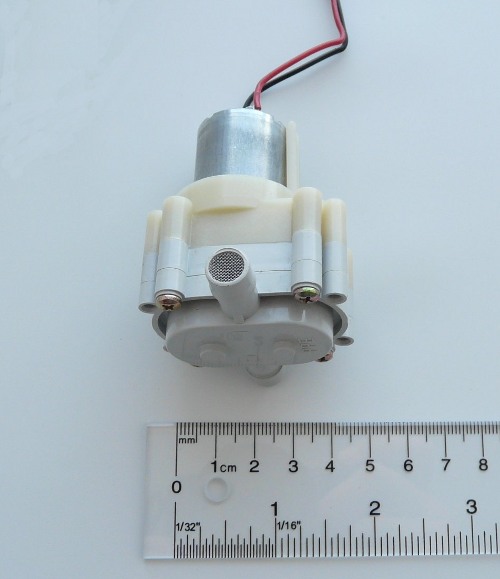
small gear pump
A small gear pump, consumes about 100mA at 6-12V.


For this type of application the wiring should be done as follows:

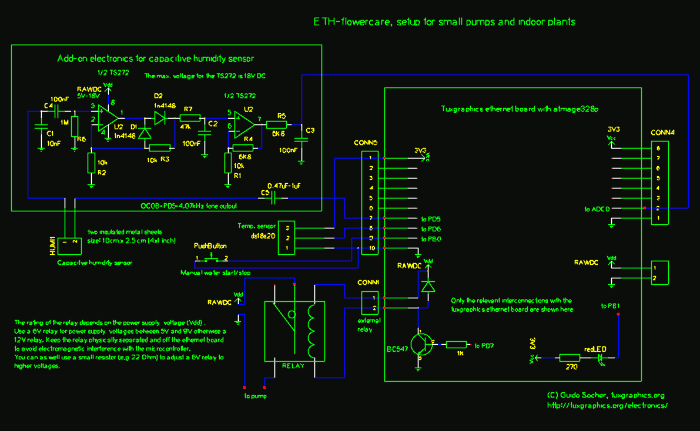
small-pump
Setup for small pumps consuming 6-12V and 100-200mA. Click on the picture for a detailed digram in PDF format.


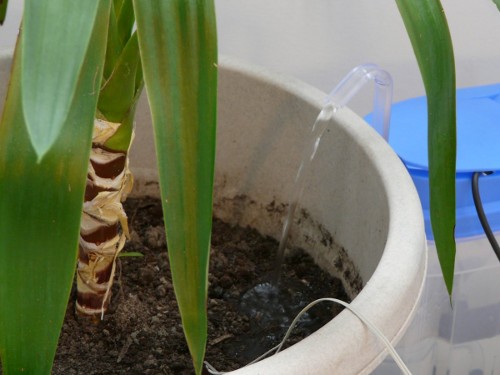
watering an indoor plant
Watering an indoor plant.


Watering outdoor plants with a sprinkler valve

Magnetic sprinkler valves are a save and reliable solution for building an outdoor garden watering system. You can find them in garden centers or specialized online shops. Some popular manufactures of those valves are Orbit, Gardena and Hunter.

The sprinkler valves have a solenoid (electromagnet) that can work with both AC and DC voltages. Most control equipment uses 24V AC. If you use DC then the valves work with much lower voltages. 16V to 18V DC will normally be enough for reliable operation of the sprinkler valve. A sprinkler valves consumes about 0.4A to 0.6A current when powered with 16V to 18V DC.

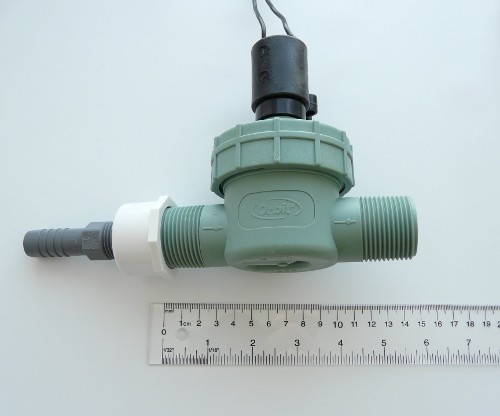
Orbit sprinkler valve
Orbit 24V AC sprinkler valve.


The tuxgraphics ethernet board can be equipped with a Recom R-783.3-0.5 switching regulator. This gives the board a wide operating voltage range from 5V-30V DC and the regulator does not get hot. With that wide voltage range you can operate everything from just one power source.

The voltage limits for the different components are:
  1. Tuxgraphics ethernet board with Recom regulator: 5V to 30V DC
  2. The add-on electronics for the capacitive humidity sensor: 5V to 18V DC
  3. Magnetic sprinkler valve: 16V to 22V DC (remember: we are running the valve with DC not AC).
In others words about 16V DC is a good choice that will allow you to operate everything with just one power supply. Original IBM (not Lenovo) Thinkpad power supplies are still easy to get and provide 16V at a few ampere.

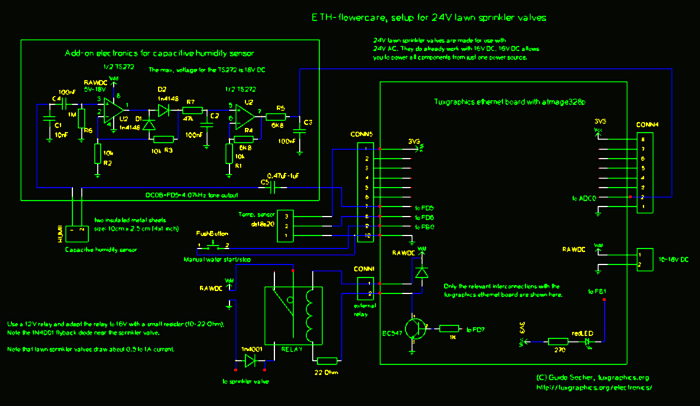
For this type of application the wiring should be done as follows:

sprinkler valve
Setup for use with a sprinkler valve. Note the fly-back diode in parallel to the valve. The diode is connected in reverse polarity, such that it will not carry any current when the power to the sprinkler valve is on. There will be a current flowing through the diode the moment you swith the relay off. It is the current induced by the magnetic field at the solenoid.


Watering plants with a magnetic valve from an old washing machine or dish washer

The advantage of this solution is that you might be able to get the valve for free from a scrap yard or when somebody throws away an old washing machine. The problem is that washing machines and dish washers are made for indoor use only and the valves are operating with line power (120V or 230V AC depending on your country).

Take good care that the setup is save by properly insulating wires that carry line power. Avoid this setup if you are not sure that you can build it such that it is 100% save.

As you need a dry environment for this setup you will definitely need to install this in a garden shed or maybe a green house.

Some washing machines have the magnetic valve inside and some have it built into the hose.

magnetic valve from a washing machine, internal version
Internal magnetic valve from a washing machine.


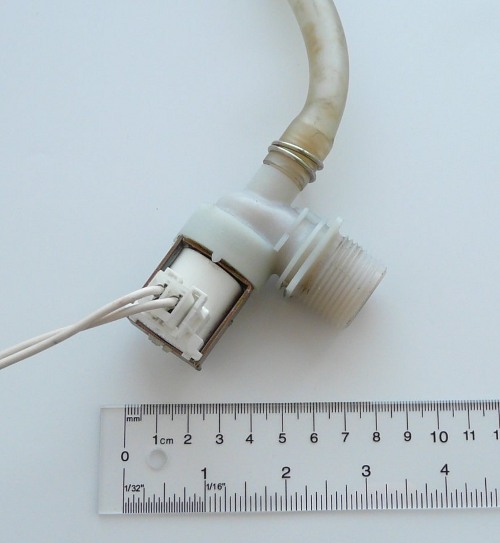
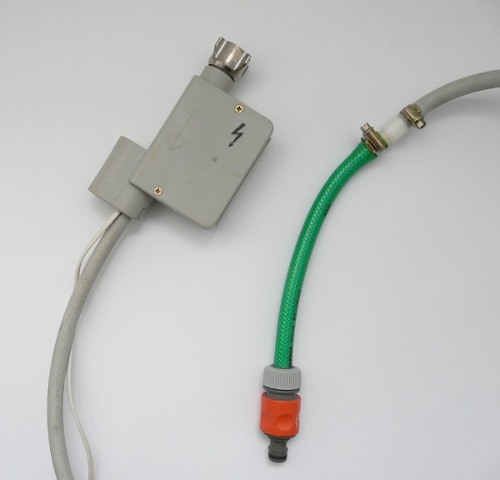
magnetic valve from a washing machine, external version
Example of an external magnetic water valve taken from an old dish washer. It was easy to remove it form the dish washer as it is integrated in the hose comming out of the dish washer. It connects directly to the water tap. This valve has already a plastic case around it but it is still only for indoor use. You can only use it in places where it does not rain onto the valve. It's not save if the valve gets wet from outside.


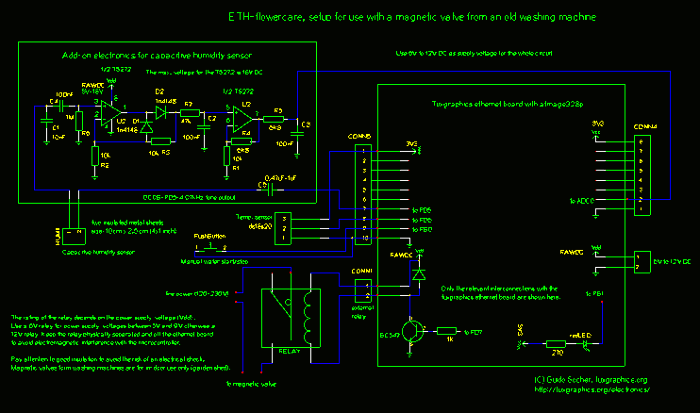
For this setup with a washing machine valve the wiring should be done as follows:

120-230V magnetic valve
Setup for use with a 120-230V magnetic valve. Make sure you insulate all parts that carry line voltage properly. All parts including the magnetic valve must be kept indoors (in a dry garden shed).

Warning: Insulate all wires properly. Use heat shrink insulation tubes at all interconnections. Make the setup such that it is impossible to touch parts that carry 120-230V. Disconnect power if you do any maintenance on the circuit.  

The user interface

You can access this flower watering system from any web browser. If you want you can use port mapping to make the flower watering system available over the internet and you can access it from your mobile phone's web browser.

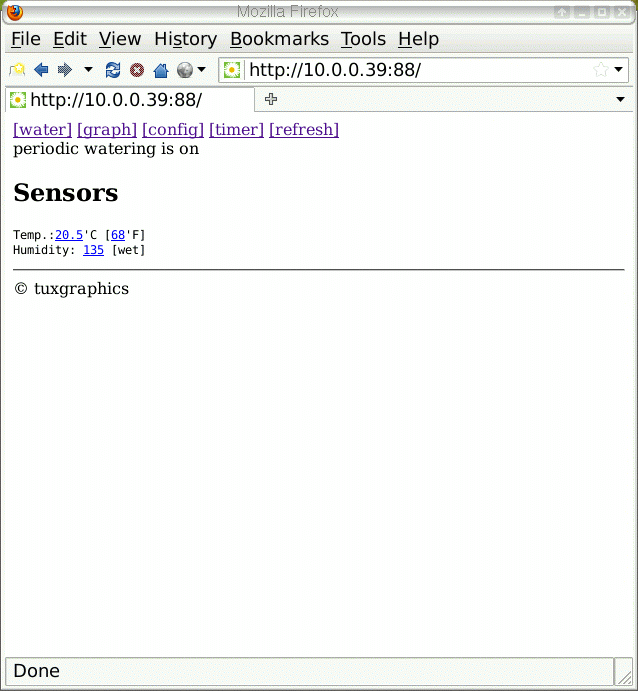
The main page:
Main page


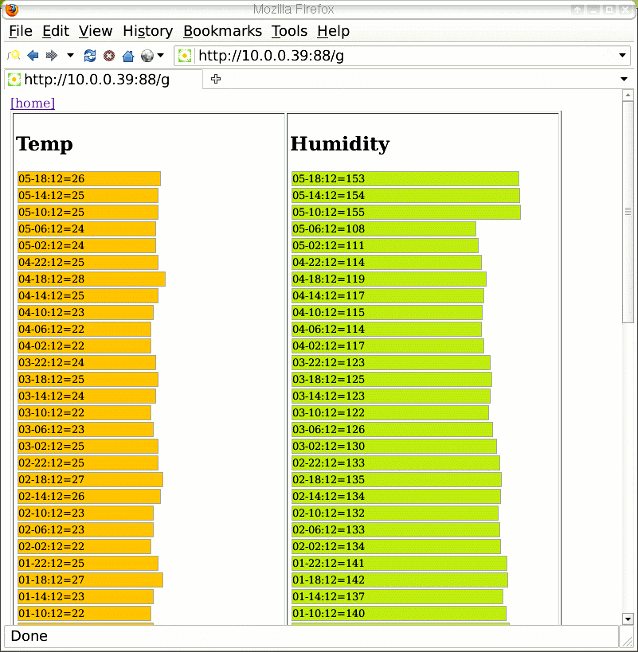
History graphs: temperature and soil humidity page:

History graphs: temperature and soil humidity


The configuration page (all settings except periodic watering):

Configuration page
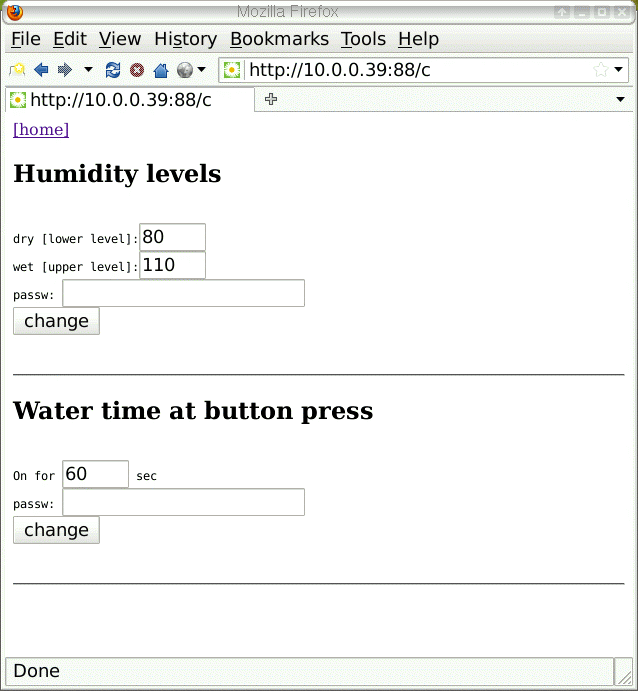
The "water time at button press" controls how long the water should run when you press the optional push button at the ethernet board. The button is a toggle button. If you press it once then it will water for the time specified here. If you press it again then the water will stop.

The humidity levels settings can be changed to calibrate the soil humidity sensor. The levels depend on the size of the metal sheets, the density of the soil and distance. Just place the metal sheets as you like and then calibrate the values according to the measurements shown and your own impression of the soil (dry/normal/wet).


Timer controlled automatic watering (the new functionality introduced in this article):

Timer controlled automatic watering


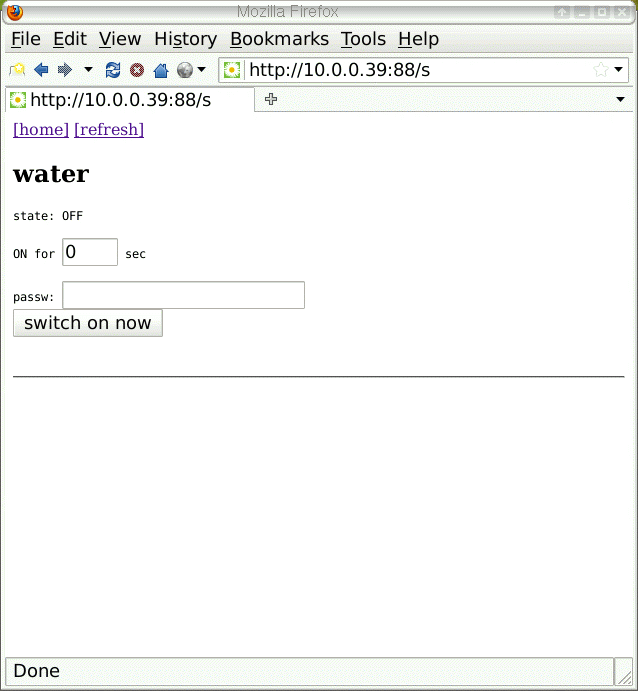
The manual watering page:

Manual watering


Electronics

At the heart of this solution is the tuxgraphics ethernet board. To be able to perform capacitive soil humidity measurements we need a few extra components. They are available as an add-on board which you can attach to the dot-matrix field of the tuxgraphics ethernet board:
Add-on board for capacitive soil humidity measurements
Add-on board for capacitive
soil humidity measurements.


What to do if the electronics gets flooded? Some customers have raised concerns that the sensitive electronics might break if they make a mistake and water spills onto the circuit. The tuxgraphics ethernet board will survive an accidental water spill quite easily as long as it can dry afterwards. Disconnect power and let it dry. It's not a problem as long as it does not happen too often and the wires corrode.

How about heat? It might be quite hot in the garden shed in summer. Personal computers don't like very hot or very cold environments but the tuxgraphics ethernet board is not a PC. It is made to survive harsh environmental conditions. Provide sufficient cooling to the voltage regulator or use a Recom R-783.3-0.5 switching regulator otherwise the circuit can easily handle 40'C in a garden shed.  

Networking in the garden shed

Most of us will not have a network connection in the garden shed. You could run a long ethernet cable into the garden but the easiest solution might be wireless. The article "AVR Wi-Fi" explains how to attach the tuxgraphics ethernet board to a Wi-Fi network.

Electricity and water might be available in most gardens. If there is no running water then use a big bucket and a pump. If there is no electricity then consider to use a car battery or a battery from a motor cycle and re-charge it via a solar pannel.  

Conclusion

I am personally using this solution now for a year and it is really good. It is very reliable and easy to use. The fact that the soil humidity sensor consists of just two metal sheets makes this a very robust solution that withstands the hash environmental conditions that you might have in the garden.

It's great when you go on summer vacation and you still want to grow nice tomatoes and vegetables. All you need to take care of your plants during vacation is a mobile phone with a data plan.  

References/Download


© Guido Socher, tuxgraphics.org

2010-06-20, generated by tuxgrparser version 2.57